Posts Tagged ‘java8’

Starting with the version 2.17.0 Mockito provides the official (built-in) support for managing a mocking life cycle if JUnit 5 is used.

IMPORTANT. This blog site has been archived. You may read an updated version of this post here.
Visit https://blog.solidsoft.pl/ to follow my new articles.

mockito-junit5-logo

Getting started

To take advantage of the integration, the Mockito’s mockito-junit-jupiter dependency is required to be added next to the JUnit 5’s junit-platform-engine one (see below for details).

After that, the new Mockito extension MockitoExtension for JUnit 5 has to be enabled. And that’s enough. All the Mockito annotation should automatically start to work.

import org.junit.jupiter.api.Test;  //do not confuse with 'org.junit.Test'!
//other imports
import org.mockito.junit.jupiter.MockitoExtension;

@ExtendWith(MockitoExtension.class)
class SpaceShipJUnit5Test {

    @InjectMocks
    private SpaceShip spaceShip;

    @Mock
    private TacticalStation tacticalStation;

    @Mock
    private OperationsStation operationsStation;

    @Test
    void shouldInjectMocks() {
        assertThat(spaceShip).isNotNull();
        assertThat(tacticalStation).isNotNull();
        assertThat(operationsStation).isNotNull();
        assertThat(spaceShip.getTacticalStation()).isSameAs(tacticalStation);
        assertThat(spaceShip.getOperationsStation()).isSameAs(operationsStation);
    }
}

It’s nice that both a test class and test methods don’t need to be public anymore.

Please note. Having also JUnit 4 on a classpath (e.g. via junit-vintage-engine) for the “legacy” part of tests it is important to do not confuse org.junit.jupiter.api.Test with the old one org.junit.Test. It will not work.

Stubbing and verification

If for some reasons you are not a fan of AssertJ (although, I encourage you to at least give it a try) JUnit 5 provides a native assertion assertThrows (which is very similar to assertThatThrownBy() from AssertJ). It provides a meaningful error message in a case of an assertion failure.

@Test
void shouldMockSomething() {
    //given
    willThrow(SelfCheckException.class).given(tacticalStation).doSelfCheck();   //void method "given..will" not "when..then" cannot be used
    //when
    Executable e = () -> spaceShip.doSelfCheck();
    //then
    assertThrows(SelfCheckException.class, e);
}

I were not myself if I would not mention here that leveraging support for default methods in interfaces available in AssertJ and mockito-java8 a lot of static imports can be made redundant.

@ExtendWith(MockitoExtension.class)
class SpaceShipJUnit5Test implements WithAssertions, WithBDDMockito {
    ...
}

Tweaking default behavior

It also worth to point our that using the JUnit 5 extension Mockito by default works in the “strict mode”. It means that – for example – unneeded stubbing will fail the test. While very often it is a code smell, there are some cases where that test construction is desired. To change the default behavior an @MockitoSettings annotation can be used.

@ExtendWith(MockitoExtension.class)
@MockitoSettings(strictness = Strictness.WARN)
class SpaceShipJUnitAdvTest implements WithAssertions, WithBDDMockito {
    ....
}

Dependencies

As I already mentioned, to start using it is required to add a Mockito’s mockito-junit-jupiter dependency next to a JUnit 5’s junit-platform-engine one. In a Gradle build it could look like:

dependencies {
    testCompile 'org.junit.vintage:junit-platform-engine:5.1.0'
    testCompile 'org.mockito:mockito-junit-jupiter:2.17.2'  //mockito-core is implicitly added

    testCompile 'org.junit.vintage:junit-vintage-engine:5.1.0'  //for JUnit 4.12 test execution, if needed
    testCompile 'org.assertj:assertj-core:3.9.1'    //if you like it (you should ;) )
}

Please note. Due to a bug with injecting mocks via constructor into final fields that I have found writing this blog post, it is recommended to use at least version 2.17.2 instead of 2.17.0. That “development” version is not available in the Maven Central and the extra Bintray repository has to be added.

repositories {
    mavenCentral()
    maven { url "https://dl.bintray.com/mockito/maven" }    //for development versions of Mockito
}

In addition, it would be a waste to do not use a brand new native support for JUnit 5 test execution in Gradle 4.6+.

test {
    useJUnitPlatform()
}

IntelliJ IDEA has provided JUnit support since 2016.2 (JUnit 5 Milestone 2 at that time). Eclipse Oxygen also seems to add support for JUnit 5 recently.

mockito-junit5-idea-results

Summary

It is really nice to have a native support for JUnit 5 in Mockito. Not getting ahead there is ongoing work to make it even better.
The feature has been implemented by Christian Schwarz and polished by Tim van der Lippe with great assist from a few other people.

The source code is available from GitHub.

Btw, are you wondering how JUnit 5 compares with Spock? I will be talking about that at GeeCON 2018.

Geecon logo

Get know how to enable named method parameters support in a Gradle project

Introduction

Java 8 has introduced (among others) an ability to get a method parameter name at runtime. For backward compatibility (mostly with existing bytecode manipulation tools) it is required to enable it explicitly. The operation is as simple as an addition of a -parameters flag to a javac call in hello world tutorials. However, it turns out to be more enigmatic to configure in a Gradle project (especially for Gradle newcomers).

PensiveDuke

Gradle

To enable support for named method arguments it is required to set it for every java compilation task in a project. It can be easily attained with:

tasks.withType(JavaCompile) {
    options.compilerArgs << '-parameters'
}

For multi-project build the construction has to be applied on all the subprojects, e.g.:

subprojects {
    (...)
    tasks.withType(JavaCompile) {
        options.compilerArgs << '-parameters'
    }
}

Rationale

For me as a Gradle veteran and Gradle plugins author construction withType and passing different compilation or runtime JVM options is a bread and butter. However, I needed to explain it more than once to less Groovy experienced workmates, so for further reference (aka “Have you read my blog? ;-) ) I have written it down. As a justification for them I have to agree that as a time of writing this blog post the top Google results point to Gradle forum threads containing also “not so good” advises. Hopefully my article will be positioned higher :-).

Tested with Gradle 2.14 and OpenJDK 1.8.0_92.

Image credits: https://duke.kenai.com/

How parallel execution of blocking “side-effect only” (aka void) tasks became easier with Completable abstraction introduced in RxJava 1.1.1.

As you may have noticed reading my blog I primarily specialize in Software Craftsmanship and automatic code testing. However, in addition I am an enthusiast of Continuous Delivery and broadly defined concurrency. The last point ranges from pure threads and semaphores in C to more high level solutions such as ReactiveX and the actor model. This time an use case for a very convenient (in specific cases) feature introduced in the brand new RxJava 1.1.1 – rx.Completable. Similarly to many my blog entries this one is also a reflection of the actual event I encountered working on real tasks and use cases.

RxJava logo

A task to do

Imagine a system with quite complex processing of asynchronous events coming from different sources. Filtering, merging, transforming, grouping, enriching and more. RxJava suits here very well, especially if we want to be reactive. Let’s assume we have already implemented it (looks and works nicely) and there is only one more thing left. Before we start processing, it is required to tell 3 external systems that we are ready to receive messages. 3 synchronous calls to legacy systems (via RMI, JMX or SOAP). Each of them can last for a number of seconds and we need to wait for all of them before we start. Luckily, they are already implemented and we treat them as black boxes which may succeed (or fail with an exception). We just need to call them (preferably concurrently) and wait for finish.

rx.Observable – approach 1

Having RxJava at fingertips it looks like the obvious approach. Firstly, job execution can be wrapped with Observable:

private Observable<Void> rxJobExecute(Job job) {
    return Observable.fromCallable(() -> { 
        job.execute();
        return null;
    });
}

Unfortunately (in our case) Observable expects to have some element(s) returned. We need to use Void and awkward return null (instead of just method reference job::execute.

Next, we can use subscribeOn() method to use another thread to execute our job (and not block the main/current thread – we don’t want to execute our jobs sequentially). Schedulers.io() provides a scheduler with a set of threads intended for IO-bound work.

Observable<Void> run1 = rxJobExecute(job1).subscribeOn(Schedulers.io());
Observable<Void> run2 = rxJobExecute(job2).subscribeOn(Schedulers.io());

Finally we need to wait for all of them to finish (all Obvervables to complete). To do that a zip function can be adapted. It combines items emitted by zipped Obserbables by their sequence number. In our case we are interested only in the first pseudo-item from each job Observable (we emit only null to satisfy API) and wait for them in a blocking way. A zip function in a zip operator needs to return something, thence we need to repeat a workaround with null.

Observable.zip(run1, run2, (r1, r2) -> return null)
         .toBlocking()
         .single();

It is pretty visible that Observable was designed to work with streams of values and there is some additional work required to adjust it to side-effect only (returning nothing) operations. The situation is getting even worse when we would need to combine (e.g. merge) our side-effect only operation with other returning some value(s) – an uglier cast is required. See the real use case from the RxNetty API.

public void execute() {
    Observable<Void> run1 = rxJobExecute(job1).subscribeOn(Schedulers.io());
    Observable<Void> run2 = rxJobExecute(job2).subscribeOn(Schedulers.io());

    Observable.zip(run1, run2, (r1, r2) -> null)
        .toBlocking()
        .single();
}

private Observable<Void> rxJobExecute(Job job) {
    return Observable.fromCallable(() -> { 
        job.execute();
        return null;
    });
}

rx.Observable – approach 2

There could be another approach used. Instead of generating an artificial item, an empty Observable with our task can be executed as an onComplete action. This forces us to switch from zip operation to merge. As a result we need to provide an onNext action (which is never executed for empty Observable) which confirms us in conviction the we try to hack the system.

public void execute() {
    Observable<Object> run1 = rxJobExecute(job1).subscribeOn(Schedulers.io());
    Observable<Object> run2 = rxJobExecute(job2).subscribeOn(Schedulers.io());

    Observable.merge(run1, run2)
            .toBlocking()
            .subscribe(next -> {});
}

private Observable<Object> rxJobExecute(Job job) {
    return Observable.empty()
            .doOnCompleted(job::execute);
}

rx.Completable

Better support for Observable that doesn’t return any value has been addressed in RxJava 1.1.1. Completable can be considered as a stripped version of Observable which can either finish successfully (onCompleted event is emitted) or fail (onError). The easiest way to create an Completable instance is using of a fromAction method which takes an Action0 which doesn’t return any value (like Runnable).

Completable completable1 = Completable.fromAction(job1::execute)
        .subscribeOn(Schedulers.io());
Completable completable2 = Completable.fromAction(job2::execute)
        .subscribeOn(Schedulers.io());

Next, we can use merge() method which returns a Completable instance that subscribes to all downstream Completables at once and completes when all of them complete (or one of them fails). As we used subscribeOn method with an external scheduler all jobs are executed in parallel (in different threads).

Completable.merge(completable1, completable2)
        .await();

await() method blocks until all jobs finish (in a case of error an exception will be rethrown). Pure and simple.

public void execute() {
    Completable completable1 = Completable.fromAction(job1::execute)
            .subscribeOn(Schedulers.io());
    Completable completable2 = Completable.fromAction(job2::execute)
            .subscribeOn(Schedulers.io());

    Completable.merge(completable1, completable2)
        .await();
}

java.util.concurrent.CompletableFuture

Some of you could ask: Why not to just use CompletableFuture? It would be a good question. Whereas pure Future introduced in Java 5 it could require additional work on our side, ListenableFuture (from Guava) and CompletableFuture (from Java 8) make it quite trivial.

First, we need to run/schedule our jobs execution. Next, using CompletableFuture.allOf() method we can create a new CompletableFuture which is completed the moment all jobs complete (haven’t we seen that conception before?). get() method just blocks waiting for that.

public void execute() {
    try {
        CompletableFuture<Void> run1 = CompletableFuture.runAsync(job1::execute);
        CompletableFuture<Void> run2 = CompletableFuture.runAsync(job2::execute);

        CompletableFuture.allOf(run1, run2)
            .get();

    } catch (InterruptedException | ExecutionException e) {
        throw new RuntimeException("Jobs execution failed", e);
    }
}

We need to do something with checked exceptions (very often we don’t want to pollute our API with them), but in general it looks sensible. However, it is worth to remember that CompletableFuture falls short when more complex chain processing is required. In addition having RxJava already used in our project it is often useful to use the same (or similar) API instead of introducing something completely new.

Summary

Thanks to rx.Completable an execution of side-effect only (returning nothing) tasks with RxJava is much more comfortable. In codebase already using RxJava it could be a preferred over CompletableFuture even for simple cases. However, Completable provides a lot of more advances operators and techniques and in addition can be easily mixed with Observable what makes it even more powerful.

To read more about Completable you may want to see the release notes. For those who want to have a deeper insight into topic there is a very detailed introduction to Completable API on Advanced RxJava blog (part 1 and 2).

The source code for code examples is available from GitHub.

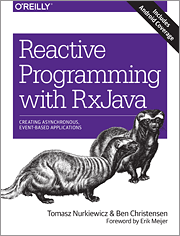
Btw, if you are interested in RxJava in general, I can with a clear conscience recommend you a book which is currently being written by Tomasz Nurkiewicz and Ben Christensen – Reactive Programming with RxJava.

RxJava book

How to simplify Mockito usage by removing static imports in Java 8 based projects.

Rationale

Mockito API is based on static methods aggregated (mostly) in the (BDD)Mockito class followed by extremely fluent, chained method calls. Mock creation, stubbing and call verification can be initiated with mock/spy/given/then/verify static methods:

@Test
public void shouldVerifyMethodExecution() {
    //given
    TacticalStation tsSpy = BDDMockito.spy(TacticalStation.class);
    BDDMockito.willDoNothing().given(tsSpy).fireTorpedo(2);
    //when
    tsSpy.fireTorpedo(2);
    tsSpy.fireTorpedo(2);
    //then
    BDDMockito.then(tsSpy).should(BDDMockito.times(2)).fireTorpedo(2);
}

Quite verbose, but starting with Java 5 one can use static imports to simplify the code, but at the cost of additional static imports:

import static org.mockito.BDDMockito.then;
import static org.mockito.BDDMockito.willDoNothing;
import static org.mockito.BDDMockito.spy;
import static org.mockito.BDDMockito.times;
(...)

@Test
public void shouldVerifyMethodExecution() {
    //given
    TacticalStation tsSpy = spy(TacticalStation.class);
    willDoNothing().given(tsSpy).fireTorpedo(2);
    //when
    tsSpy.fireTorpedo(2);
    tsSpy.fireTorpedo(2);
    //then
    then(tsSpy).should(times(2)).fireTorpedo(2);
}

Imports can be hidden in IDE and usually do not disturb much. Nevertheless to be able to write just a method name (e.g. mock(TacticalStation.class)) without a class is it required to press ALT-ENTER (in IntelliJ IDEA) to add each static import on the first usage of a given method in a test class. The situation is even worse in Eclipse where it is required to earlier add BDDMockito to “Favorites” in “Content Assist” to make it suggested by IDE. Eclipse guys could say “you have to do it just once”, but as I experienced during my testing/TDD trainings it makes a Mockito learning (usage) curve a little bit steeper.

Of course there are some tricks like using star imports by default for Mockito classes to reduce number of required key strokes, but if you use Java 8 in your project (hopefully a majority of you) there is a simpler way to cope with it.

Static imports free approach

Mockito-Java8 2.0.0 (and its counterpart for Mockito 1.10.x – version 1.0.0) introduces a set of interfaces which provide all methods from Mockito API. By “implement” them in a test class all those methods become automatically directly accessible in written tests:

//no static imports needed!

public class SpaceShipTest implements WithBDDMockito {

    @Test
    public void shouldVerifyMethodExecution() {
        //given
        TacticalStation tsSpy = spy(TacticalStation.class);
        willDoNothing().given(tsSpy).fireTorpedo(2);
        //when
        tsSpy.fireTorpedo(2);
        tsSpy.fireTorpedo(2);
        //then
        then(tsSpy).should(times(2)).fireTorpedo(2);
    }
}

The code looks exactly like in the previous snippet, but there is not need to do any static import (besides a normal import of WithBDDMockito itself).

Under the hood the WithBDDMockito interface implementation is dead simple. All methods are default methods which just delegate to proper static method in BDDMockito class.

default <T> BDDMockito.BDDMyOngoingStubbing<T> given(T methodCall) {
    return BDDMockito.given(methodCall);
}

Flavors of Mockito

Mockito methods are provided by 3 base interfaces, being an entry points for given set of methods:
WithBDDMockito – stubbing/mocking API in BDD style (provides also classic API).
WithMockito – classic stubbing/mocking API
WithAdditionalMatchers – additional Mokcito matchers (basic account are included in With(BDD)Mockito)

Summary

Java 8 has opened the new opportunities how (test) code can be written in more compact and readable way. Static imports free Mockito code can simplify writing tests a little bit, but there is more feature already available in Mockito-Java8 and even more to be included in Mockito 3.0 (those for which Mockito internals have to be modified in a non backward compatible way). Too take more ideas how code/projects can be refactored to benefit from Java 8 you can see my short presentation “Java 8 brings power to testing!” (slides and video).

Mockito-Java8 2.0.0-beta (for Mockito >=2.0.22-beta) and 1.0.0-beta (for Mockito 1.10.x and earlier betas of Mockito 2) is available through Maven Central. The versions should be pretty stable, but I would like to get wider feedback about this new feature, so it is labeled as beta. More details can be found on the project webpage.

Acknowledge. The idea was originally proposed by David Gageot (the guy behind Infinitest) in one of his blog posts.

Mockito logo

Mockito-Java8 is a set of Mockito add-ons leveraging Java 8 and lambda expressions to make mocking with Mockito even more compact.

At the beginning of 2015 I gave my flash talk Java 8 brings power to testing! at GeeCON TDD 2015 and DevConf.cz 2015. In my speech using 4 examples I showed how Java 8 – namely lambda expressions – can simplify testing tools and testing in general. One of those tools was Mokcito. To not let my PoC code die on slides and to make it simply available for others I have released a small project with two, useful in specified case, Java 8 add-ons for Mockito.

Mockito logo

Quick introduction

As a prerequisite, let’s assume we have the following data structure:

@Immutable
class ShipSearchCriteria {
    int minimumRange;
    int numberOfPhasers;
}

The library provides two add-ons:

Lambda matcher – allows to define matcher logic within a lambda expression.

given(ts.findNumberOfShipsInRangeByCriteria(
    argLambda(sc -> sc.getMinimumRange() > 1000))).willReturn(4);

Argument Captor – Java 8 edition – allows to use ArgumentCaptor in a one line (here with AssertJ):

verify(ts).findNumberOfShipsInRangeByCriteria(
    assertArg(sc -> assertThat(sc.getMinimumRange()).isLessThan(2000)));

Lambda matcher

With a help of the static method argLambda a lambda matcher instance is created which can be used to define matcher logic within a lambda expression (here for stubbing). It could be especially useful when working with complex classes pass as an argument.

@Test
public void shouldAllowToUseLambdaInStubbing() {
    //given
    given(ts.findNumberOfShipsInRangeByCriteria(
        argLambda(sc -> sc.getMinimumRange() > 1000))).willReturn(4);
    //expect
    assertThat(ts.findNumberOfShipsInRangeByCriteria(
        new ShipSearchCriteria(1500, 2))).isEqualTo(4);
    //expect
    assertThat(ts.findNumberOfShipsInRangeByCriteria(
        new ShipSearchCriteria(700, 2))).isEqualTo(0);
}

In comparison the same logic implemented with a custom Answer in Java 7:

@Test
public void stubbingWithCustomAsnwerShouldBeLonger() {  //old way
    //given
    given(ts.findNumberOfShipsInRangeByCriteria(any())).willAnswer(new Answer<Integer>() {
        @Override
        public Integer answer(InvocationOnMock invocation) throws Throwable {
            Object[] args = invocation.getArguments();
            ShipSearchCriteria criteria = (ShipSearchCriteria) args[0];
            if (criteria.getMinimumRange() > 1000) {
                return 4;
            } else {
                return 0;
            }
        }
    });
    //expect
    assertThat(ts.findNumberOfShipsInRangeByCriteria(
        new ShipSearchCriteria(1500, 2))).isEqualTo(4);
    //expect
    assertThat(ts.findNumberOfShipsInRangeByCriteria(
        new ShipSearchCriteria(700, 2))).isEqualTo(0);
}

Even Java 8 and less readable constructions don’t help too much:

@Test
public void stubbingWithCustomAsnwerShouldBeLongerEvenAsLambda() {  //old way
    //given
    given(ts.findNumberOfShipsInRangeByCriteria(any())).willAnswer(invocation -> {
        ShipSearchCriteria criteria = (ShipSearchCriteria) invocation.getArguments()[0];
        return criteria.getMinimumRange() > 1000 ? 4 : 0;
    });
    //expect
    assertThat(ts.findNumberOfShipsInRangeByCriteria(
        new ShipSearchCriteria(1500, 2))).isEqualTo(4);
    //expect
    assertThat(ts.findNumberOfShipsInRangeByCriteria(
        new ShipSearchCriteria(700, 2))).isEqualTo(0);
}

Argument Captor – Java 8 edition

A static method assertArg creates an argument matcher which implementation internally uses ArgumentMatcher with an assertion provided in a lambda expression. The example below uses AssertJ to provide meaningful error message, but any assertions (like native from TestNG or JUnit) could be used (if really needed). This allows to have inlined ArgumentCaptor:

@Test
public void shouldAllowToUseAssertionInLambda() {
    //when
    ts.findNumberOfShipsInRangeByCriteria(searchCriteria);
    //then
    verify(ts).findNumberOfShipsInRangeByCriteria(
        assertArg(sc -> assertThat(sc.getMinimumRange()).isLessThan(2000)));
}

In comparison to 3 lines in the classic way:

@Test
public void shouldAllowToUseArgumentCaptorInClassicWay() {  //old way
    //when
    ts.findNumberOfShipsInRangeByCriteria(searchCriteria);
    //then
    ArgumentCaptor<ShipSearchCriteria> captor = 
        ArgumentCaptor.forClass(ShipSearchCriteria.class);
    verify(ts).findNumberOfShipsInRangeByCriteria(captor.capture());
    assertThat(captor.getValue().getMinimumRange()).isLessThan(2000);
}

Summary

The presented add-ons were created as PoC for my conference speech, but should be fully functional and potentially useful in the specific cases. To use it in your project it is enough to use Mockito 1.10.x or 2.0.x-beta, add mockito-java8 as a dependency and of course compile your project with Java 8+.

More details are available on the project webpage: https://github.com/szpak/mockito-java8

Update 20151217. You may be also interested in my new blog post about using Mockito wihtout static imports.

AssertJ and Awaitility are two of my favorites tools using in automatic code testing. Unfortunately until recently it was not possible to use it together. But then Java 8 entered the game and several dozens lines of code was enough to make it happen in Awaility 1.6.0.

Awaitility logo

AssertJ provides a rich set of assertions with very helpful error messages, all available though the fluent type aware API. Awaitility allows to express expectations of asynchronous calls in a concise and easy to read way leveraging an active wait pattern which shortens the duration of tests (no more sleep(5000)!).

The idea to use it together came into my mind a year ago when I was working on an algo trading project using Complex event processing (CEP) and I didn’t like to learn Hamcrest assertion just for asynchronous tests with Awaitility. I was able to do a working PoC, but it required to make some significant duplication in AssertJ (then FEST Assert) code and I shelved the idea. A month ago I was preparing my presentation about asynchronous code testing for the 4Developers conference and asked myself a question: How Java 8 could simplify the usage of Awaitility?

For the few examples I will use asynchronousMessageQueue which can be used to send ping request and return number of received packets. One of the ways to test it with Awaitility in Java 7 (besides proxy based condition) is to create a Callable class instance:

    @Test
    public void shouldReceivePacketAfterWhileJava7Edition() {
        //when
        asynchronousMessageQueue.sendPing();
        //then
        await().until(receivedPackageCount(), equalTo(1));
    }

    private Callable receivedPackageCount() {
        return new Callable() {
            @Override
            public Integer call() throws Exception {
                return asynchronousMessageQueue.getNumberOfReceivedPackets();
            }
        };
    }

where equalTo() is a standard Hamcrest matcher.

The first idea to reduce verbosity is to replace Callable with a lambda expression and inline the private method:

    @Test
    public void shouldReceivePacketAfterWhile() {
        //when
        asynchronousMessageQueue.sendPing();
        //then
        await().until(() -> asynchronousMessageQueue.getNumberOfReceivedPackets(), equalTo(1));
    }

Much better. Going forward lambda expression can be replaced with a method reference:

    @Test
    public void shouldReceivePacketAfterWhile() {
        //when
        asynchronousMessageQueue.sendPing();
        //then
        await().until(asynchronousMessageQueue::getNumberOfReceivedPackets, equalTo(1));
    }

Someone could go even further and remove Hamcrest matcher:

    @Test
    public void shouldReceivePacketAfterWhile() {
        //when
        asynchronousMessageQueue.sendPing();
        //then
        await().until(() -> asynchronousMessageQueue.getNumberOfReceivedPackets() == 1);  //poor error message
    }

but while it still works the error message becomes much less meaningful:

ConditionTimeoutException: Condition with lambda expression in
AwaitilityAsynchronousShowCaseTest was not fulfilled within 2 seconds.

instead of very clear:

ConditionTimeoutException: Lambda expression in AwaitilityAsynchronousShowCaseTest
that uses AbstractMessageQueueFacade: expected  but was  within 2 seconds.>

The solution would be to use AssertJ assertion inside lambda expression:

    @Test
    public void shouldReceivePacketAfterWhileAssertJEdition() {
        //when
        asynchronousMessageQueue.sendPing();
        //then
        await().until(() -> assertThat(asynchronousMessageQueue.getNumberOfReceivedPackets()).isEqualTo(1));
    }

and thanks to the new AssertionCondition initially hacked within a few minutes it became a reality in Awaitility 1.6.0. Of course AssertJ fluent API and meaningful failure messages for different data types are preserved.

As a bonus all assertions that throw AssertionError (so particularly TestNG and JUnit standard assertions) can be used in the lambda expression as well (but I don’t know anyone who came back to “standard” assertion knowing the power of AssertJ).

The nice thing is that the changes itself leverage Runnable class to implement lambdas and AssertJ support and Awaitility 1.6.0 is still Java 5 compatible. Nevertheless for the sake of readability it is only sensible to use the new constructions in Java 8 based projects.

Update. Be aware that in the meantime until() has been renamed to untilAsserted().

Btw, here are the “slides” from my presentation at 4Developers.

4developers logo